Build a Great Nest.js Blog: Filter by Tag
Min-jun Kim
Dev Intern · Leapcell
In the previous tutorial, we added the functionality to create and display tags for our blog.
Next, we will complete the remaining part of the tag functionality: filtering posts by tags.
When a user clicks on a tag link on the post detail page, we need to direct them to a list page that only displays all the posts under that tag. To do this, we need to create new routes and handling logic in the backend, and create the corresponding view in the frontend.
Step 1: Extend the Service Logic
First, we'll add new methods to our services to find posts by tag ID.
Open the src/posts/posts.service.ts file and add the following content:
// src/posts/posts.service.ts

// ... (other imports and constructor)

async findByTag(tagId: string): Promise<Post[]> {
  return this.postsRepository
    .createQueryBuilder('post')
    .leftJoinAndSelect('post.tags', 'tag')
    .where('tag.id = :tagId', { tagId })
    .orderBy('post.createdAt', 'DESC')
    .getMany();
}

// ... (rest of the file)
Because
findByTaginvolves a many-to-many relationship, we usecreateQueryBuilderto JOIN the intermediate table of posts and tags and filter bytagId.
To display the tag's name on the filter page, we need to add a simple findOne method to TagsService.
// src/tags/tags.service.ts
async findOne(id: string): Promise<Tag | null> {
  return this.tagsRepository.findOneBy({ id });
}
Step 2: Create the Controller and Route
Now, let's implement the controller to handle /tags/:id requests.
Write the Controller Logic
Create the corresponding controller file:
nest generate controller tags
Open src/tags/tags.controller.ts and add the following code:
// src/tags/tags.controller.ts
import { Controller, Get, Param, Render, Request } from '@nestjs/common';
import { TagsService } from './tags.service';
import { PostsService } from '../posts/posts.service';

@Controller('tags')
export class TagsController {
  constructor(private readonly tagsService: TagsService, private readonly postsService: PostsService) {}

  @Get(':id')
  @Render('posts-by-filter')
  async findPostsByTag(@Param('id') id: string, @Request() req) {
    const posts = await this.postsService.findByTag(id);
    const tag = await this.tagsService.findOne(id);
    return {
      posts,
      user: req.session.user,
      filterType: 'Tag',
      filterName: tag ? tag.name : 'Unknown',
    };
  }
}
Update Module Dependencies
For the above code to work correctly, we need to update the module files to handle the dependencies between services.
Since PostsService and TagsService depend on each other, we need to use forwardRef to resolve the circular dependency issue.
First, export PostsService so that other modules can use it. At the same time, modify how PostsModule references TagsModule.
// src/posts/posts.module.ts
import { Module, forwardRef } from '@nestjs/common';

// ...

@Module({
  imports: [
    TypeOrmModule.forFeature([Post]),
    CommentsModule,
    TrackingModule,
    forwardRef(() => TagsModule), // Use forwardRef to avoid circular dependency
  ],
  // ...,
  exports: [PostsService], // Export PostsService
})
export class PostsModule {}
Then, import PostsModule into TagsModule.
// src/tags/tags.module.ts
import { Module, forwardRef } from '@nestjs/common';
import { PostsModule } from '../posts/posts.module'; // import
//...

@Module({
  imports: [TypeOrmModule.forFeature([Tag]), forwardRef(() => PostsModule)], // Add to imports
  controllers: [TagsController],
  providers: [TagsService],
})
export class TagsModule {}
Step 3: Create the Frontend View
Finally, we'll create a posts-by-filter.ejs view file in the views folder. This file will be used to display the list of posts filtered by tag. Its content is very similar to index.ejs.
Create the views/posts-by-filter.ejs file:
<%- include('_header', { title: `Posts in ${filterName}` }) %> <div class="filter-header"> <h2>Posts in Tag: <strong><%= filterName %></strong></h2> </div> <% if (posts.length > 0) { %> <div class="post-list"> <% posts.forEach(post => { %> <article class="post-item"> <h2><a href="/posts/<%= post.id %>"><%= post.title %></a></h2> <p><%= post.content.substring(0, 150) %>...</p> <small><%= new Date(post.createdAt).toLocaleDateString() %></small> </article> <% }) %> </div> <% } else { %> <p>No posts found in this tag.</p> <% } %> <a href="/" class="back-link" style="margin-top: 2rem;">← Back to Home</a> <%- include('_footer') %>
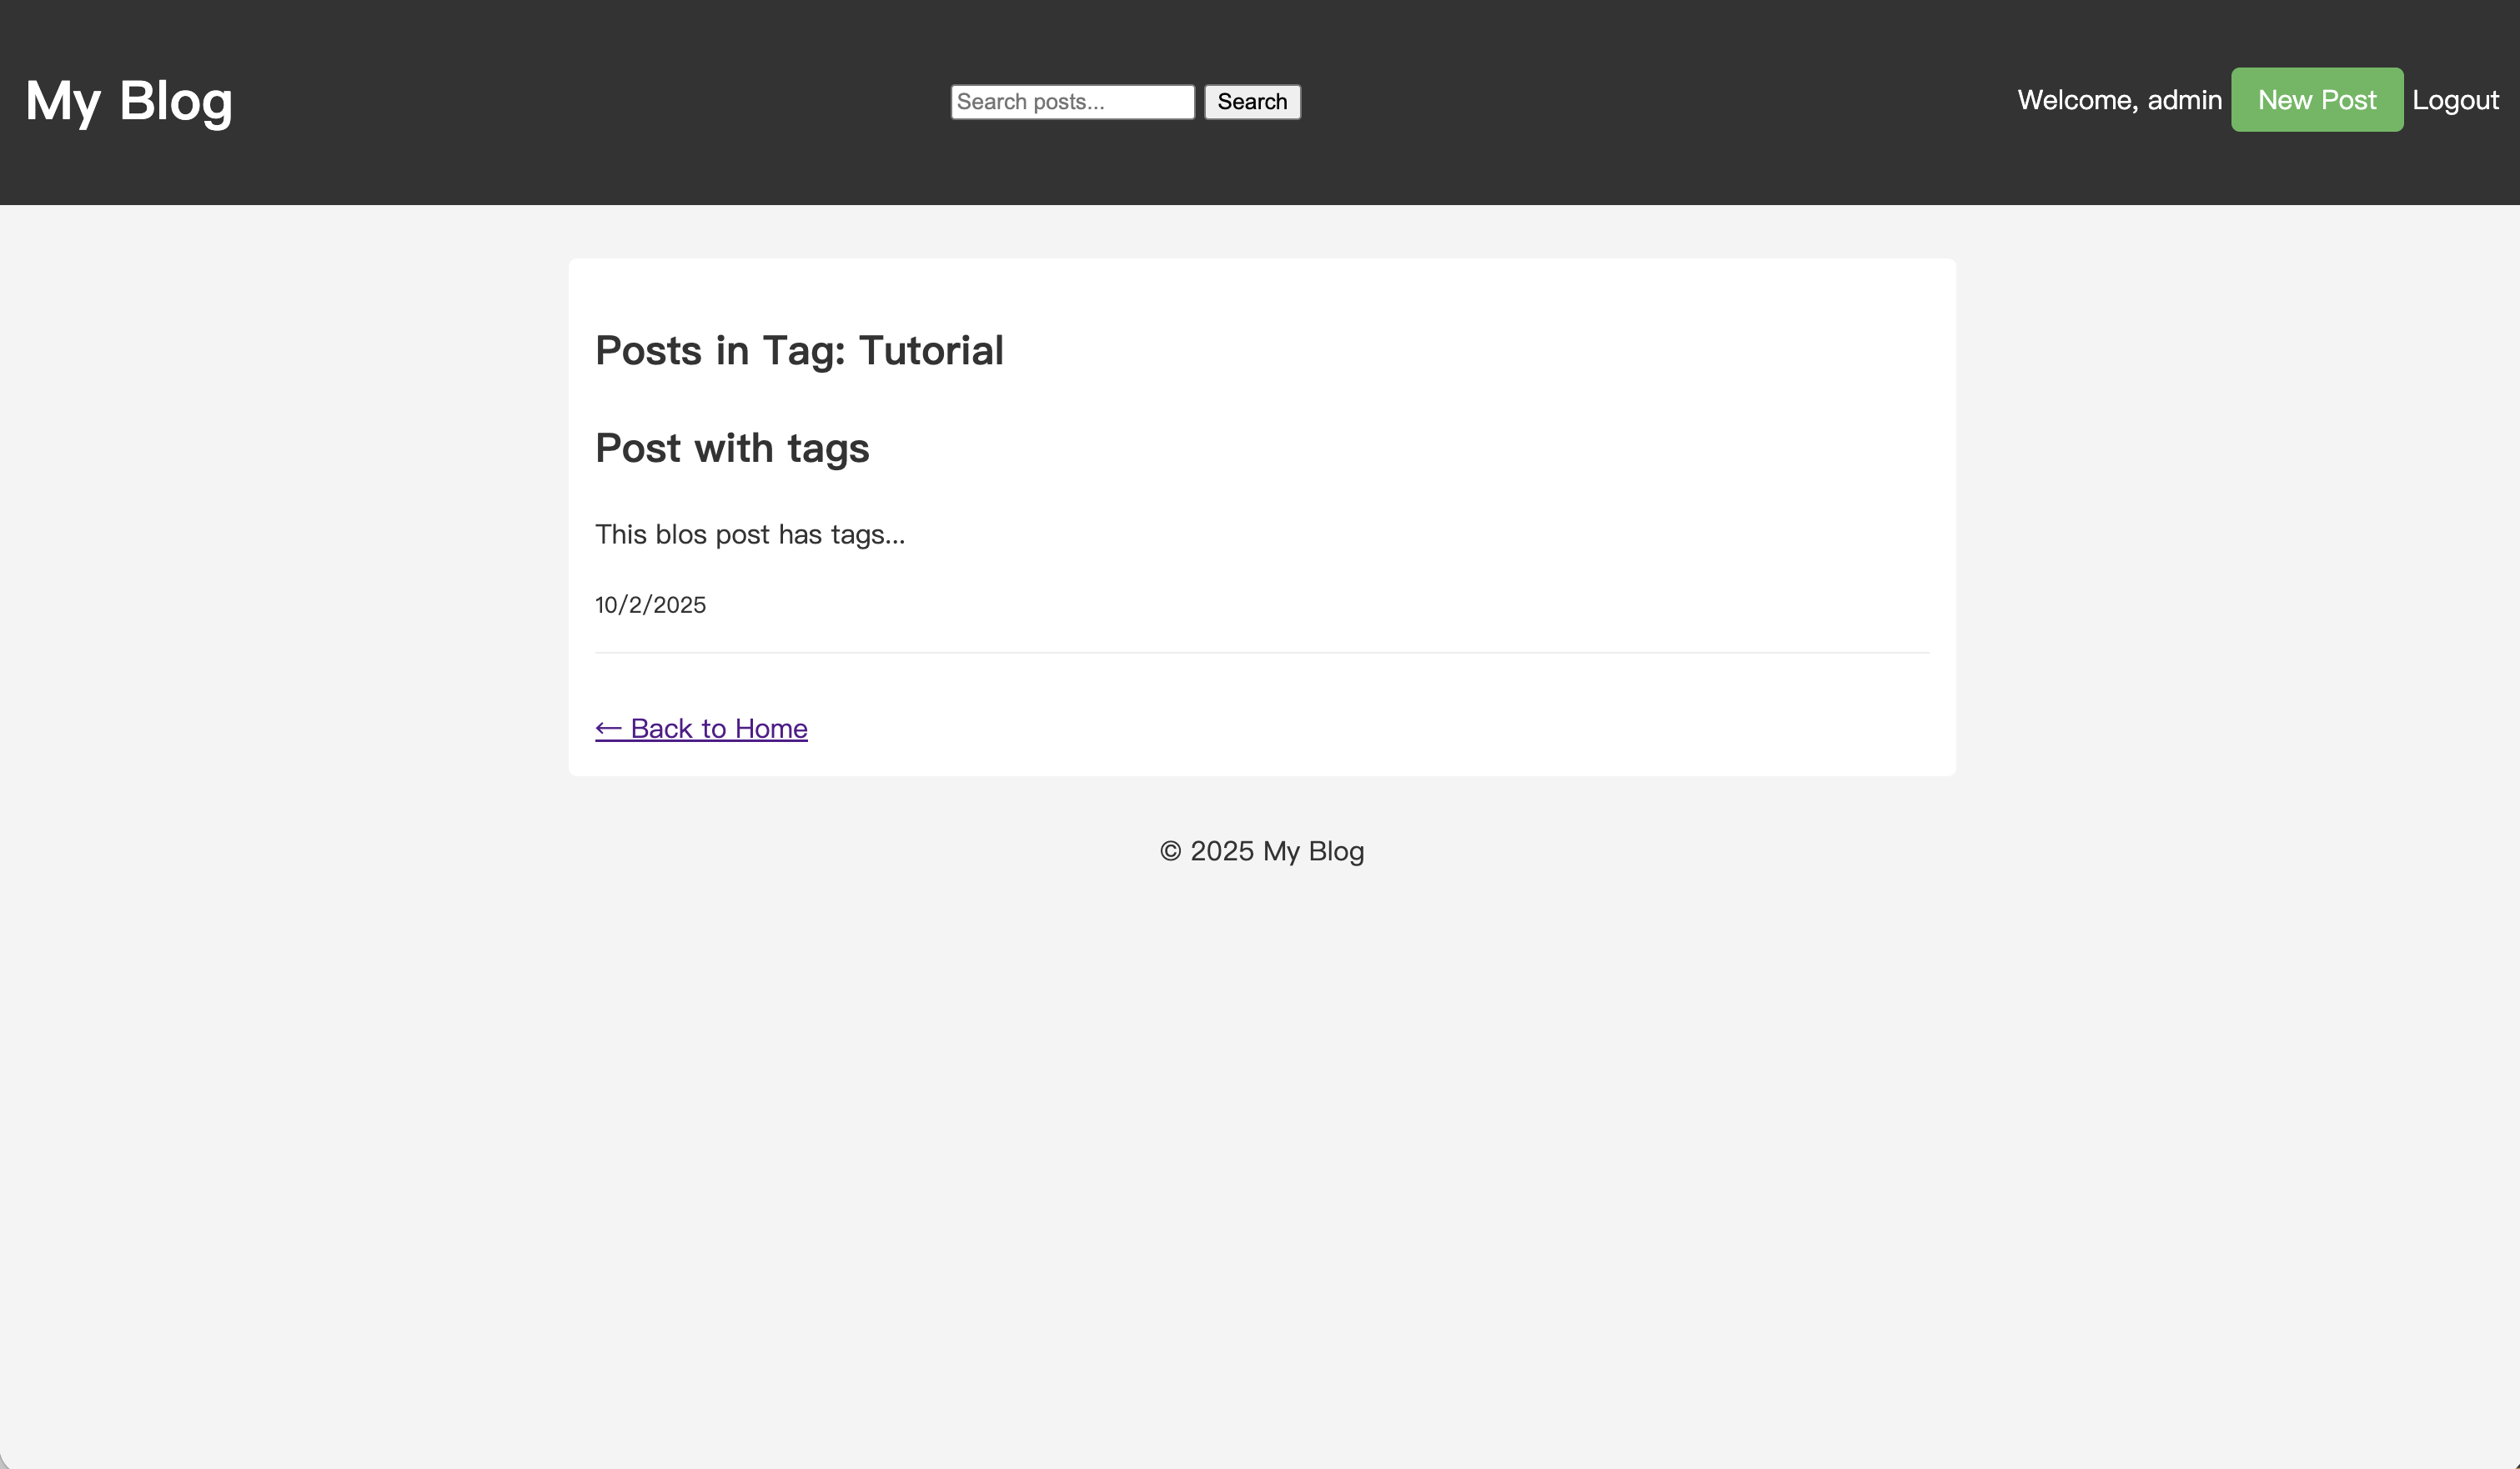
This template will dynamically display the title (e.g., "Posts in Tag: Tutorial") and the list of posts. If there are no posts under the tag, it will display a message.
Now, the entire filtering process is complete. When you restart the application and click a tag link on a post's detail page, you will be directed to the corresponding filter page.
Running and Testing
Restart your application:
npm run start:dev
Open your browser and visit: http://localhost:3000/
Visit a post that includes tags and click on any tag.
You will be redirected to the corresponding tag's filter page and see a list of all posts under that tag.
Through these two tutorials, we have added a complete tagging system to our blog.
At this point, our blog project has covered everything from basic architecture to core functionalities, content organization, and data analysis.
The detailed features of a blog are endless. Based on the current framework, you can continue to add more functionalities. The rest is up to your imagination!
Don't forget to deploy on Leapcell, which comes with Nest.js support, a PostgreSQL database, Redis, Web Analytics, and all the tools you need to build your web app.

Previous Tutorials:
- Build a Great Nest.js Blog: Tags for Post
- Build a Great Nest.js Blog: Visitor Analytics
- Build a Great Nest.js Blog: Full-Text Search for Posts
- Build a Great Nest.js Blog: Upload Image
- Build a Great Nest.js Blog: Reply Comment
- Build a Great Nest.js Blog: Comment System
- Build a Great Nest.js Blog: Add Authorization
- Build a Great Nest.js Blog: Add User System
- 10 Minutes from First Line of Code to Live Deployment: A Super Fast Nest.js Blog Course

