Build Your Own Forum with FastAPI: Step 5 - Editing Posts
Min-jun Kim
Dev Intern · Leapcell
In the previous article, we built a user system for our forum. Now, users can register, log in, and publish posts under their own identity.
However, once a post is published, it currently cannot be modified. What if you spot an error or want to add more content?
In this article, we will implement a new feature: allowing users to edit the posts they have created.
Step 1: Create the Post Edit Page
First, we need a new HTML page where users can modify the title and content of their posts. This page will be very similar to the new post form, but it will come pre-filled with the post's existing data.
In the templates folder, create a new file named edit_post.html.
templates/edit_post.html
<!DOCTYPE html>
<html>
  <head>
    <title>Edit Post - My FastAPI Forum</title>
    <style>
      body {
        font-family: sans-serif;
        margin: 2em;
      }
      form {
        width: 500px;
        margin: 0 auto;
      }
      input,
      textarea {
        width: 100%;
        padding: 8px;
        margin-bottom: 10px;
        box-sizing: border-box;
      }
      button {
        padding: 10px 15px;
        background-color: #007bff;
        color: white;
        border: none;
        cursor: pointer;
      }
      a {
        display: block;
        margin-top: 1em;
        text-align: center;
      }
    </style>
  </head>
  <body>
    <h1>Edit Post</h1>
    <form method="post">
      <input type="text" name="title" value="{{ post.title }}" required /><br />
      <textarea name="content" rows="10" required>{{ post.content }}</textarea
      ><br />
      <button type="submit">Update Post</button>
    </form>
    <a href="/posts">Cancel</a>
  </body>
</html>
The core of this template is a form with two input fields: title and content. We use Jinja2's {{ post.title }} and {{ post.content }} syntax to pre-populate the form with the post data passed from the backend.
Step 2: Add API Routes for Editing
Next, we need to add two new routes in main.py to handle the editing logic. Open the main.py file and add the following code:
main.py (Adding new routes)
# ... (Previous imports and app, templates definitions remain unchanged) ...

# --- Routes ---

# ... (Previous routes like /, /posts, /api/posts remain unchanged) ...

@app.get("/posts/{post_id}/edit", response_class=HTMLResponse)
async def get_edit_post_form(
    request: Request,
    post_id: int,
    db: AsyncSession = Depends(get_db),
    current_user: Optional[models.User] = Depends(get_current_user)
):
    if not current_user:
        return RedirectResponse(url="/login", status_code=status.HTTP_302_FOUND)

    result = await db.execute(select(models.Post).where(models.Post.id == post_id))
    post = result.scalar_one_or_none()

    if not post:
        raise HTTPException(status_code=404, detail="Post not found")

    if post.owner_id != current_user.id:
        raise HTTPException(status_code=403, detail="Not authorized to edit this post")

    return templates.TemplateResponse("edit_post.html", {"request": request, "post": post})


@app.post("/posts/{post_id}/edit")
async def edit_post(
    post_id: int,
    title: str = Form(...),
    content: str = Form(...),
    db: AsyncSession = Depends(get_db),
    current_user: Optional[models.User] = Depends(get_current_user)
):
    if not current_user:
        return RedirectResponse(url="/login", status_code=status.HTTP_302_FOUND)

    result = await db.execute(select(models.Post).where(models.Post.id == post_id))
    post = result.scalar_one_or_none()

    if not post:
        raise HTTPException(status_code=404, detail="Post not found")

    if post.owner_id != current_user.id:
        raise HTTPException(status_code=403, detail="Not authorized to edit this post")

    post.title = title
    post.content = content
    await db.commit()

    return RedirectResponse(url="/posts", status_code=status.HTTP_303_SEE_OTHER)

# ... (Subsequent routes like /register, /login, /logout remain unchanged) ...
Here, we've added two routes:
GET /posts/{post_id}/edit: This route finds a post in the database based on thepost_idfrom the URL. It then verifies that thepost.owner_idmatches thecurrent_user.id. If the validation passes, it renders theedit_post.htmltemplate, passing the queriedpostobject to it.POST /posts/{post_id}/edit: This route receives the newtitleandcontentfrom the form and updates the attributes of thepostobject. This operation also validates the login status and post ownership.
Step 3: Add an Entry Point on the Main Page
The routes are ready. Next, we need to add an entry point for posts so that users can access the edit page.
Modify the templates/posts.html file.
templates/posts.html (Updated)
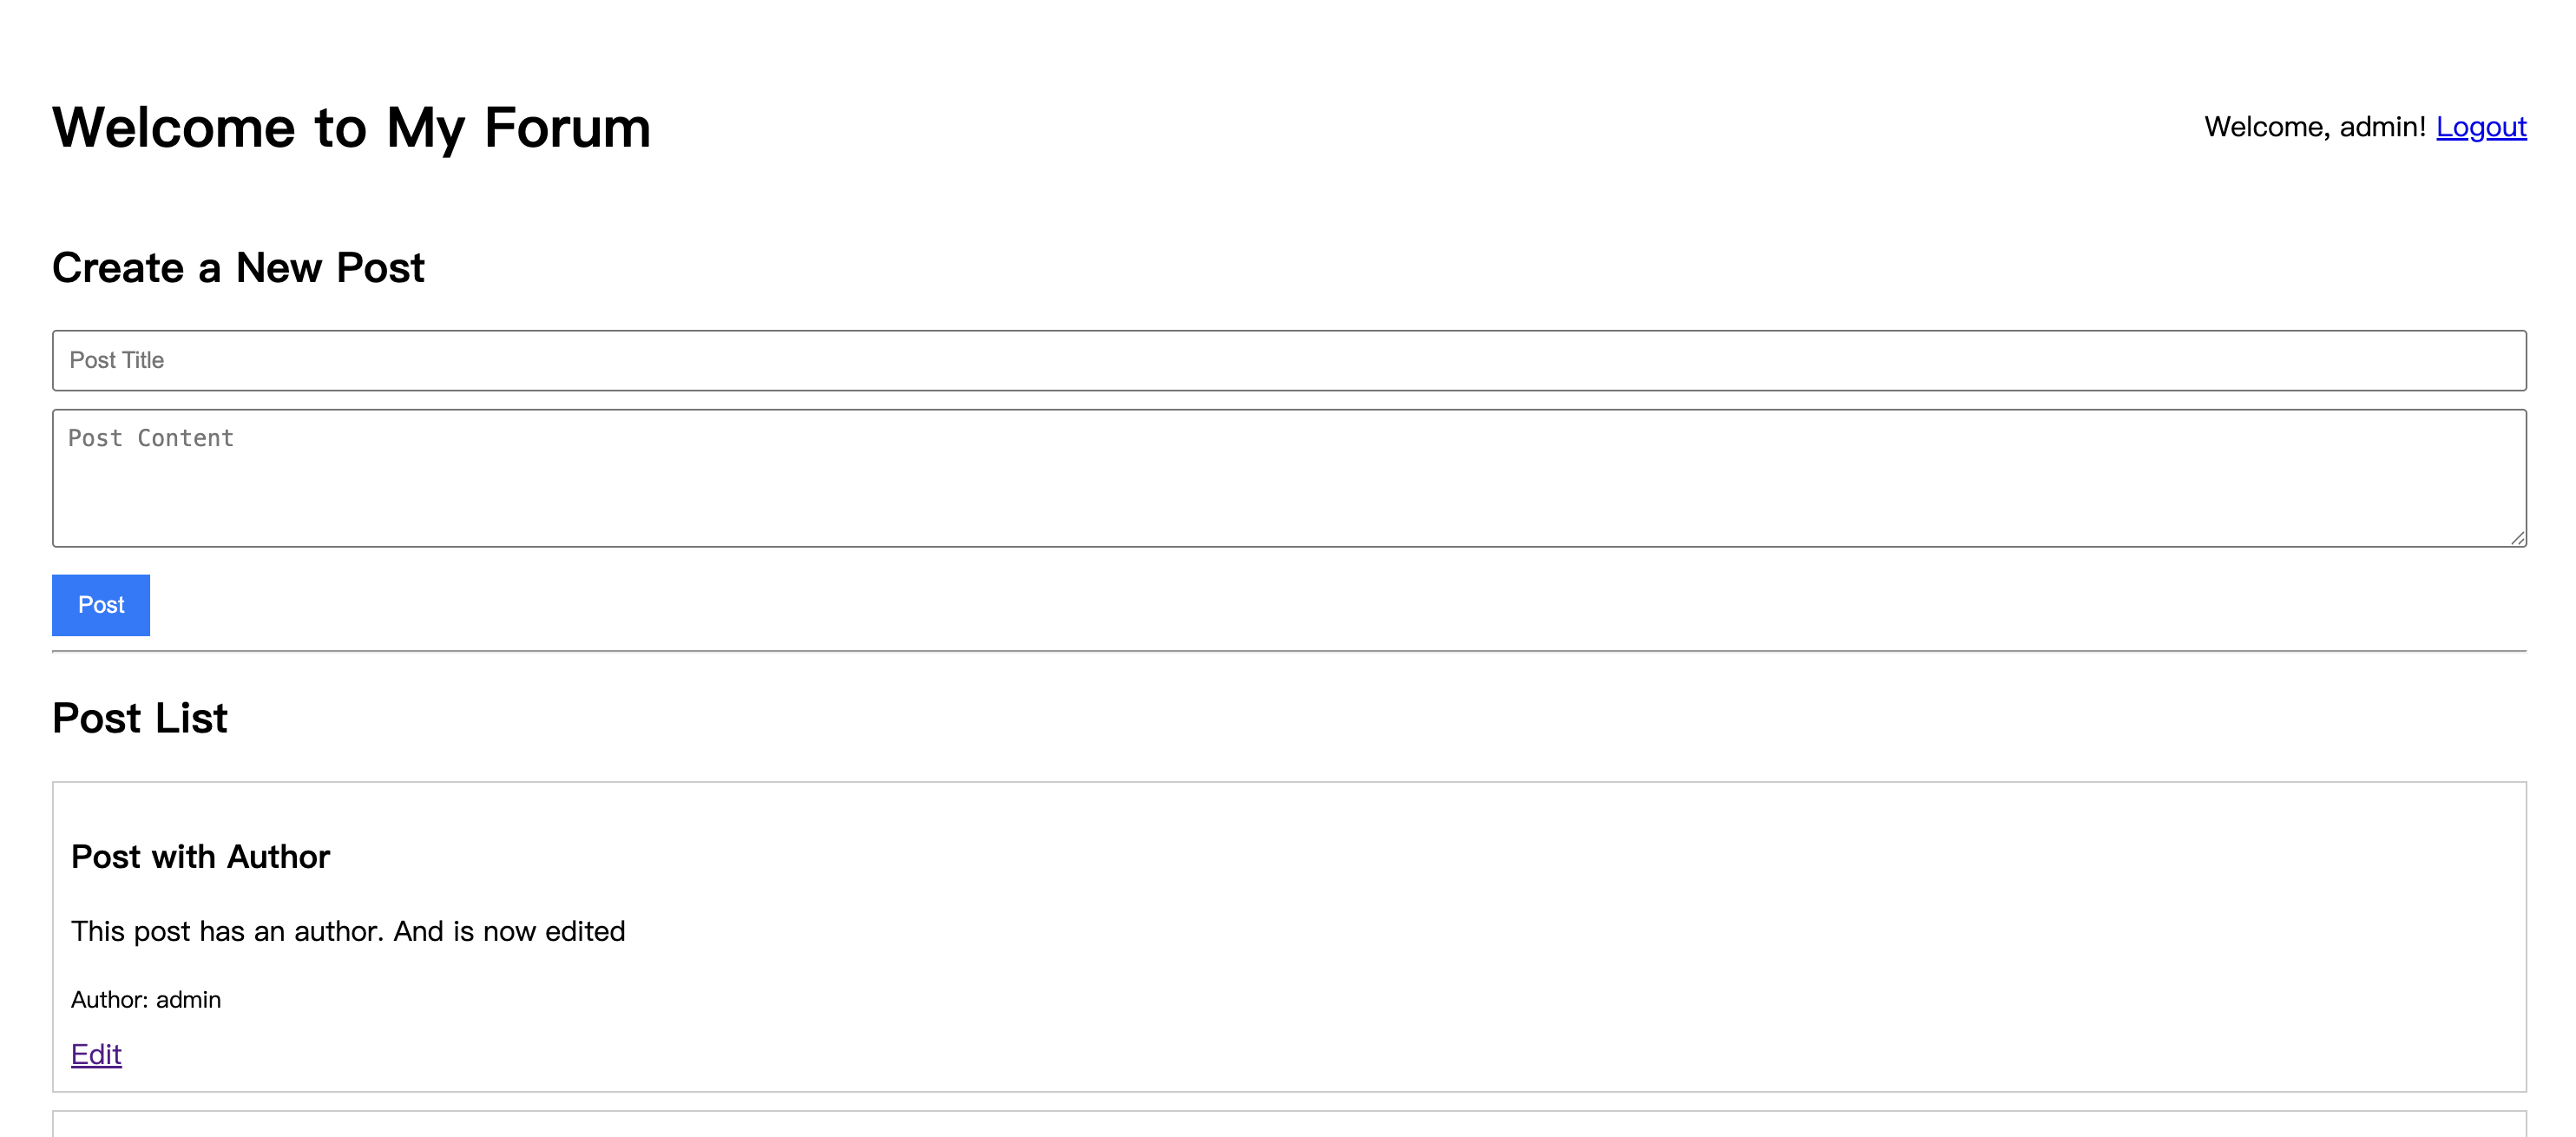
... (File header and stylesheet remain unchanged) ...
<body>
    ... (Header and new post form sections remain unchanged) ...

    <hr />
    <h2>Post List</h2>

    {% for post in posts %}
    <div style="border: 1px solid #ccc; padding: 10px; margin-bottom: 10px;">
      <h3>{{ post.title }}</h3>
      <p>{{ post.content }}</p>
      <small>Author: {{ post.owner.username if post.owner else 'Unknown' }}</small>

      {% if current_user and post.owner_id == current_user.id %}
      <div style="margin-top: 10px;">
        <a href="/posts/{{ post.id }}/edit">Edit</a>
      </div>
      {% endif %}
    </div>
    {% endfor %}
</body>
</html>
We've added a Jinja2 conditional statement below the post information:
{% if current_user and post.owner_id == current_user.id %}
If the current user is logged in (current_user exists) and the owner_id of the post matches the id of the current user, an "Edit" link pointing to /posts/{{ post.id }}/edit will be displayed.
This way, users will only see the edit button on their own posts and cannot edit posts belonging to others.
Run and Verify
Restart your uvicorn server:
uvicorn main:app --reload
Visit http://127.0.0.1:8000 and log in.
Find a post you previously published, and you will see an "Edit" link below it. For posts by other users, you will not see the "Edit" link.
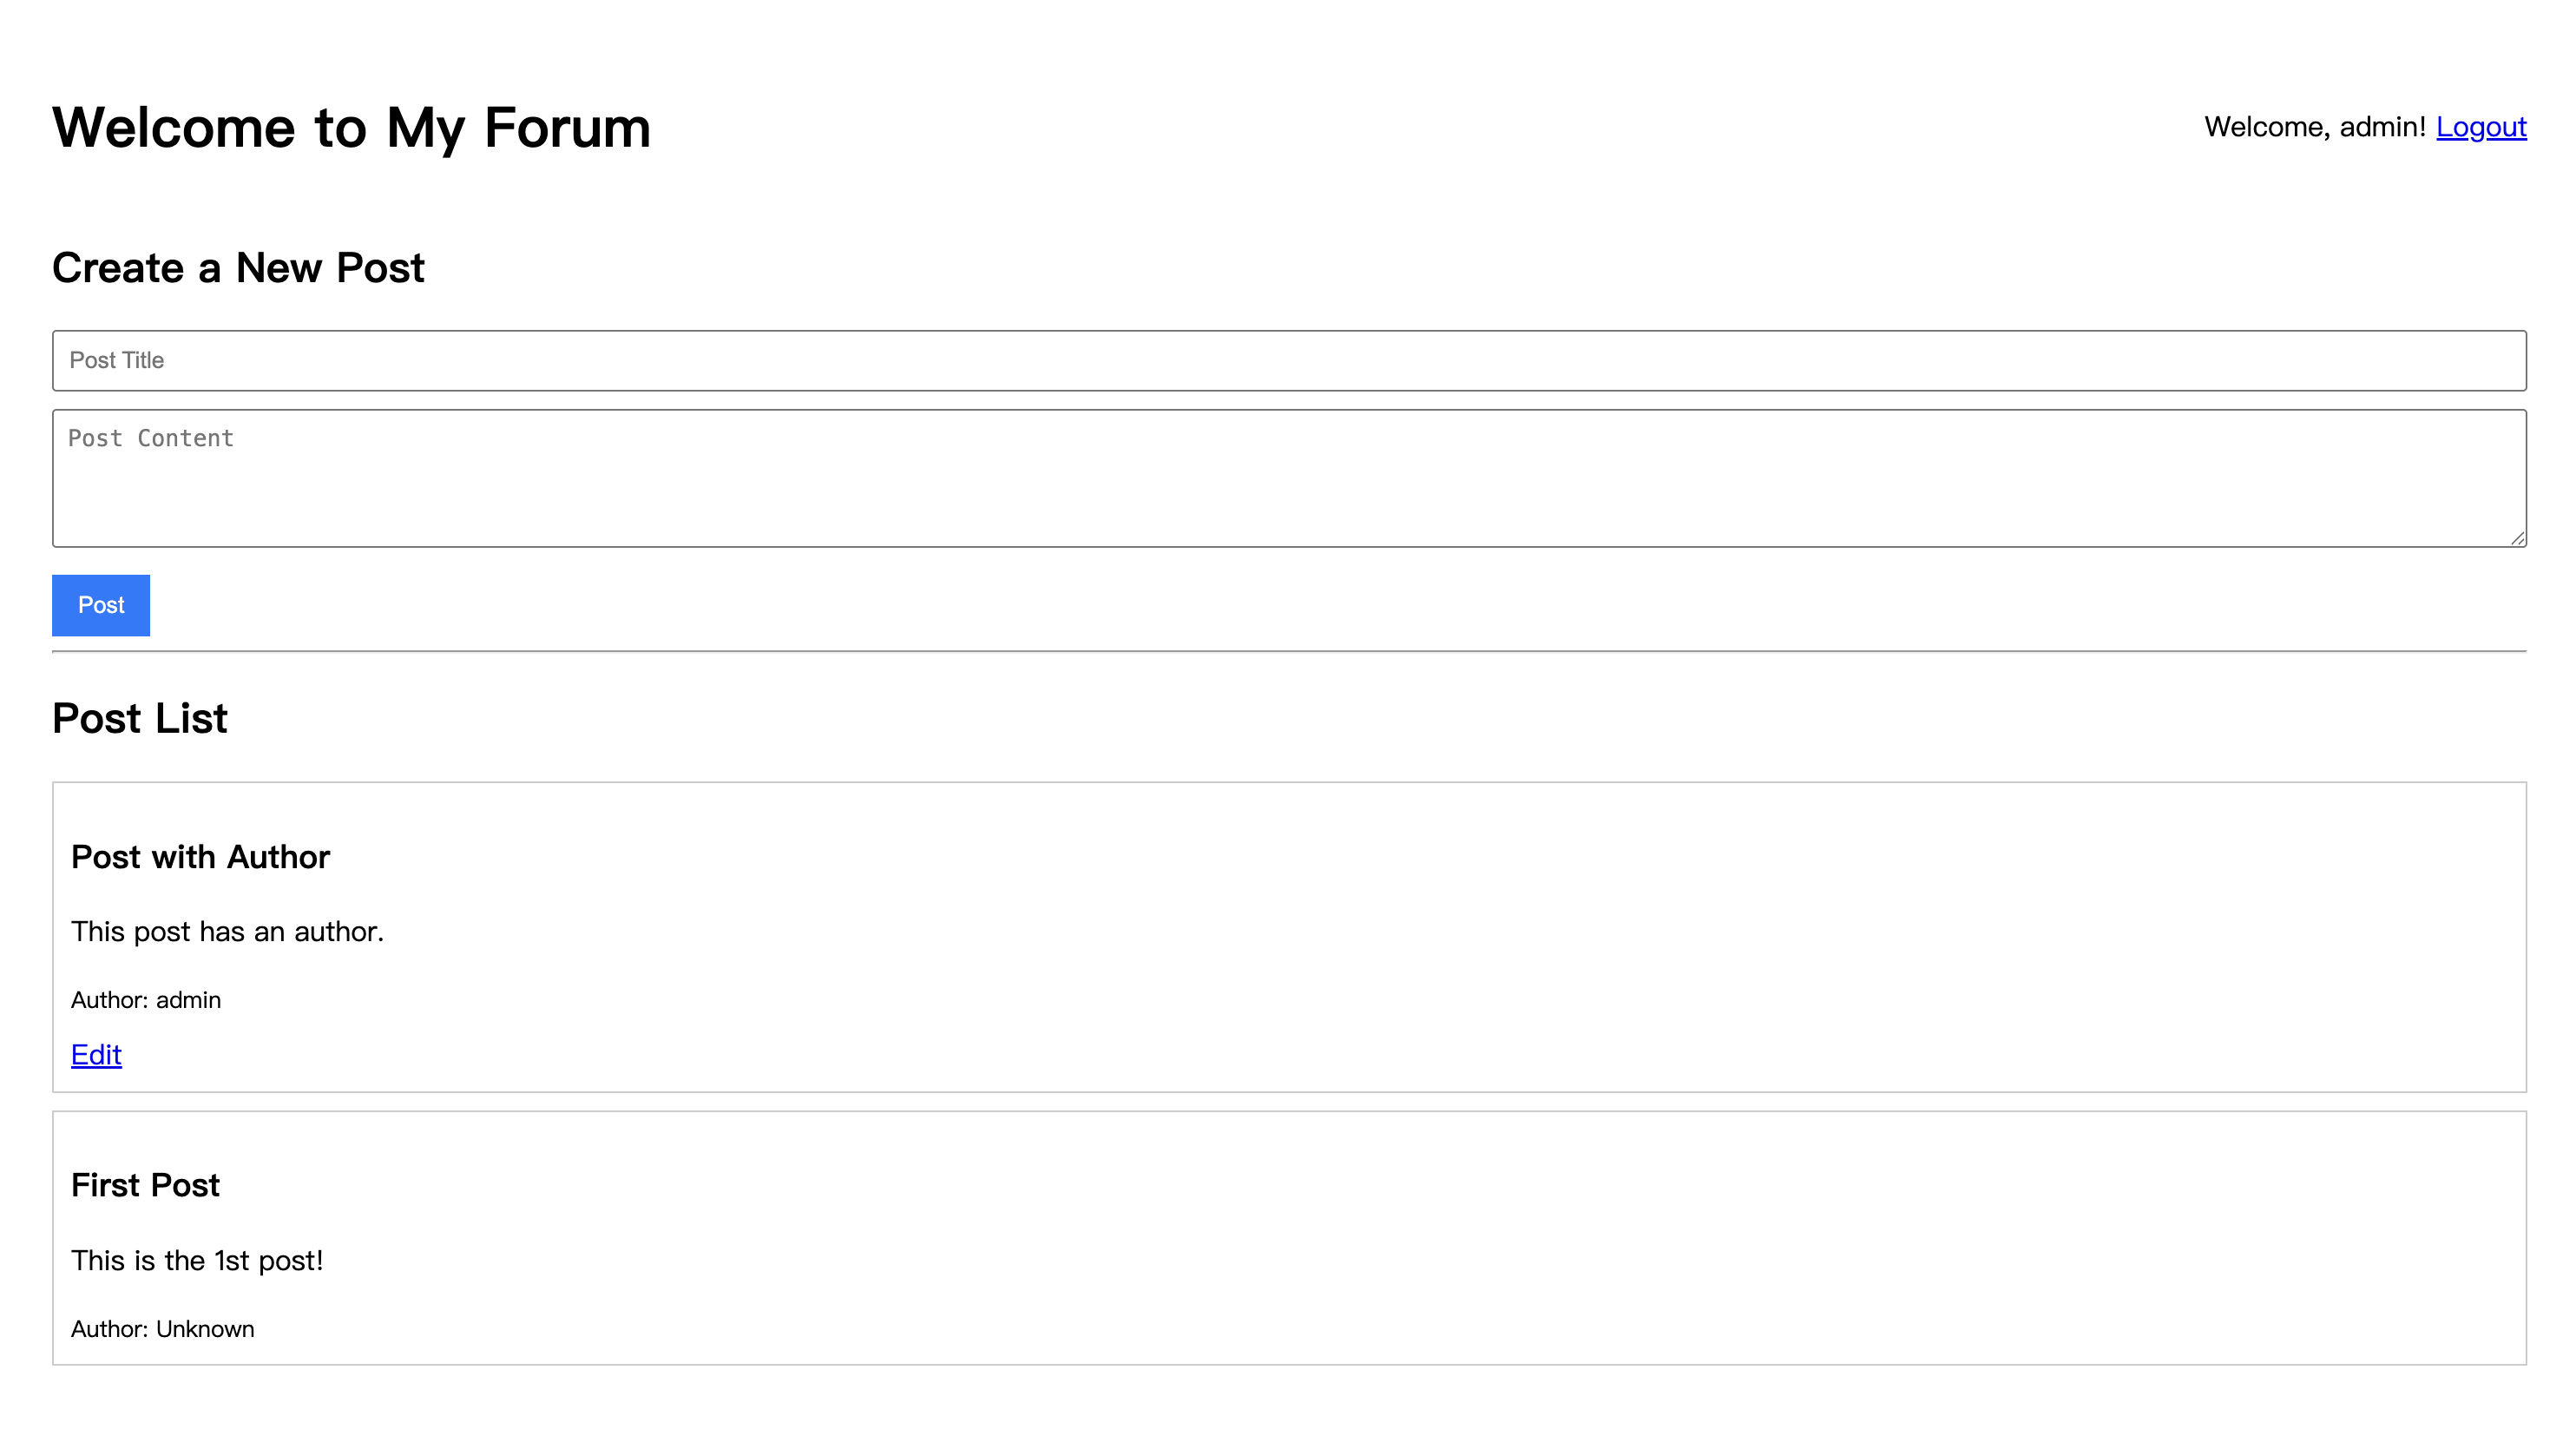
Click "Edit," and the page will redirect to the edit form, pre-filled with the post's original title and content.
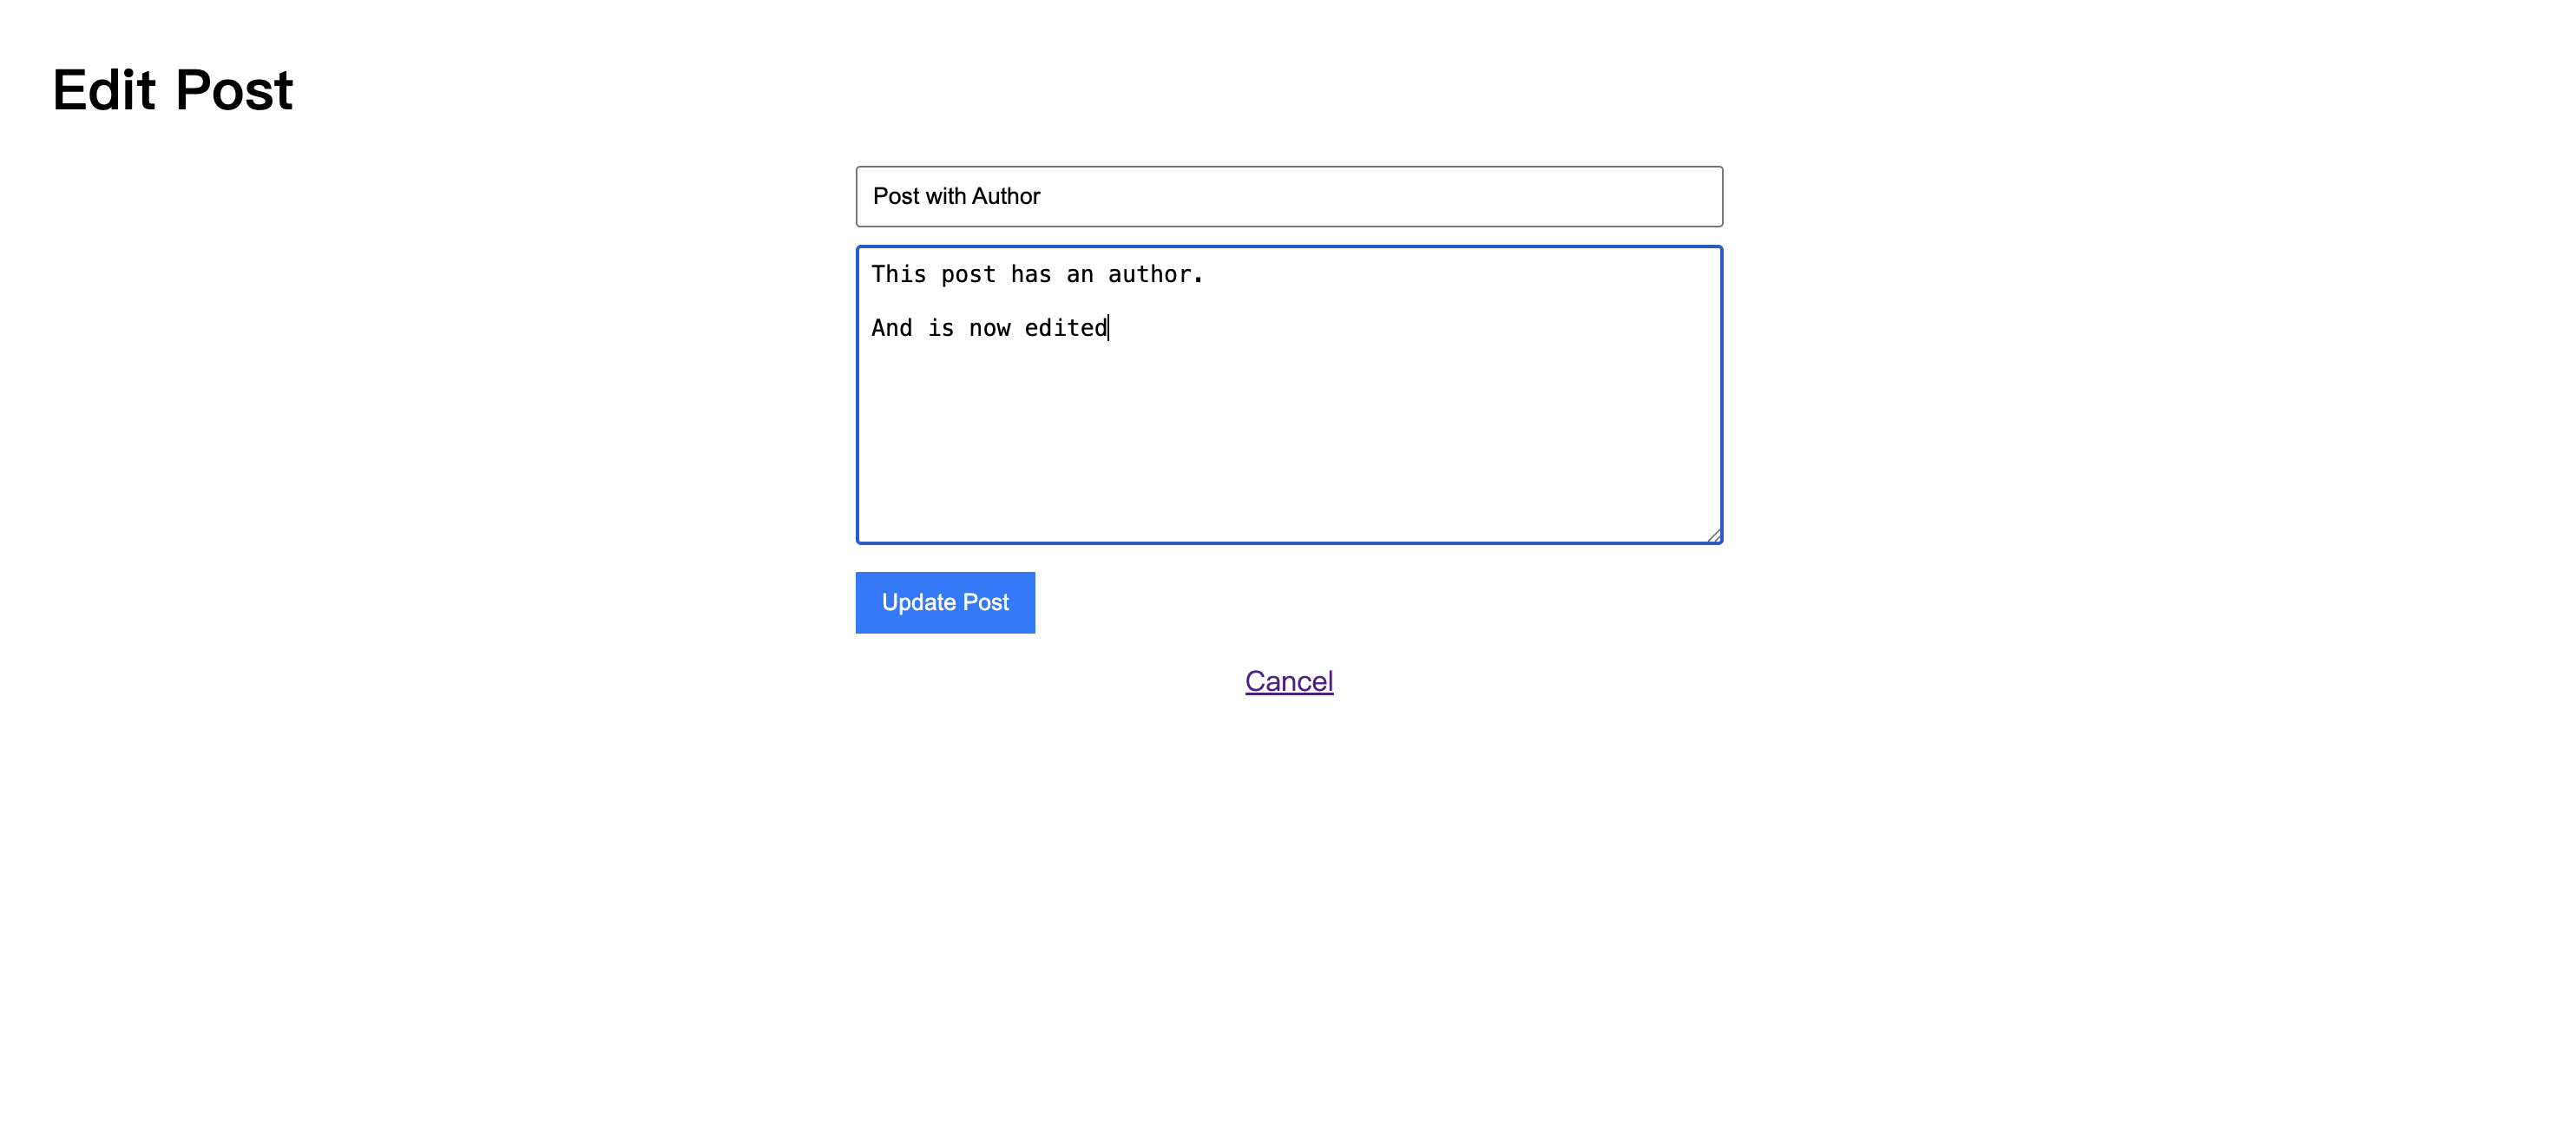
Modify the content and click "Update Post." The page will redirect back to the homepage, where you will see that the post content has been successfully updated.
Deploying the Project Online
Just like in the first tutorial, you can deploy the results of this step online to let your friends experience the changes and progress of your project.
A simple deployment solution is to use Leapcell.

If you have deployed before, simply push the code to your Git repository, and Leapcell will automatically redeploy the latest code for you.
If you haven't used Leapcell's deployment service before, you can refer to the tutorial in this article.
Summary
Now that the forum has an editing feature, it has become more complete.
Besides posting, interaction is essential for a forum. When users see an interesting (or controversial) post, they will want to share their opinions below it.
In the next article, we will add an interactive feature to the forum: implementing comments and replies for posts, allowing users to have discussions around them.