Nest.js Blog Step by Step: Add User System
Wenhao Wang
Dev Intern · Leapcell
In the previous tutorial, we built a basic blog that supports creating articles.
The danger, however, is that this blog has no authentication, meaning anyone can create or delete articles.
In the upcoming tutorials, we will make this blog more secure by gradually adding a user and authentication system.
Without further ado, let's get started.
Introduction to Authentication Methods
In web development, the two most common authentication methods are Token-based (e.g., JWT) and Session-based (Cookie).
- JWT (JSON Web Tokens): This is the most popular authentication method today. After a user logs in, the server generates a token and returns it to the client. The client includes this token in subsequent requests, and the server simply verifies that the token has not been tampered with. Because the server does not store the user's login state, this method is very suitable for modern large-scale websites with countless servers, as it avoids the need for frequent synchronization of user status across multiple servers.
- Session-Cookie: After a user logs in, the server creates a session and returns the Session ID to the browser via a cookie. The browser automatically includes this cookie in subsequent requests. The server then uses the Session ID from the cookie to find the corresponding session information it has stored, thereby identifying the user.
In this tutorial, we will choose the Session-Cookie method. Our blog is a simple application with a traditional architecture. Using Session-Cookies for authentication is the most direct, classic, and secure approach. Nest.js also provides excellent built-in support for it.
Create the User Module
Before we tackle authentication, let's first add a user system.
Similar to creating the posts module in the previous tutorial, use the Nest CLI to quickly generate the necessary files:
nest generate module users
nest generate controller users
nest generate service users
Next, create a user entity file user.entity.ts in the src/users directory to map to the users table in the database.
// src/users/user.entity.ts
import { Entity, Column, PrimaryGeneratedColumn } from 'typeorm';

@Entity()
export class User {
  @PrimaryGeneratedColumn('uuid')
  id: string;

  @Column({ unique: true })
  username: string;

  @Column()
  password: string; // The stored password will be encrypted
}
In UsersModule (src/users/users.module.ts), register TypeOrmModule so it can operate on the User entity. Note that you need to export UsersService so it can be used in other modules later (like the Auth module).
// src/users/users.module.ts
import { Module } from '@nestjs/common';
import { TypeOrmModule } from '@nestjs/typeorm';
import { UsersController } from './users.controller';
import { UsersService } from './users.service';
import { User } from './user.entity';

@Module({
  imports: [TypeOrmModule.forFeature([User])],
  controllers: [UsersController],
  providers: [UsersService],
  exports: [UsersService], // Export UsersService for use in other modules
})
export class UsersModule {}
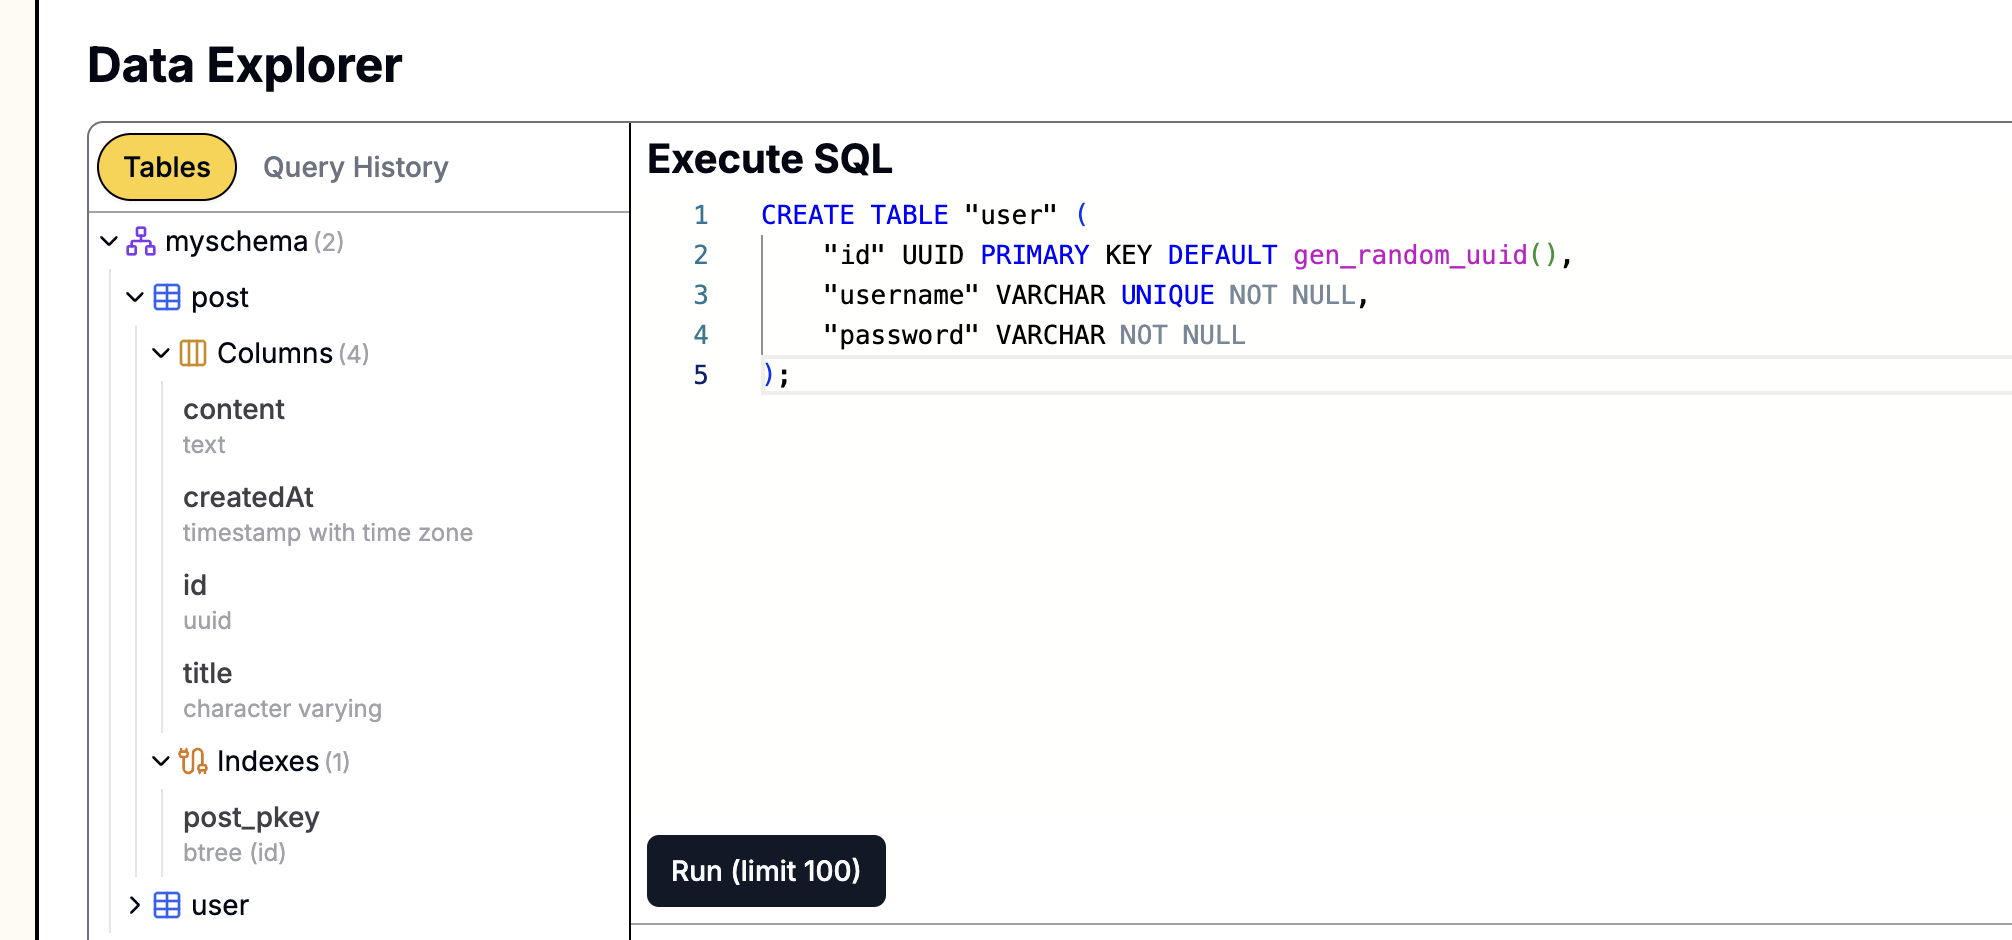
Finally, execute the following SQL statement in the PostgreSQL database we created in the last tutorial to create the user table:
CREATE TABLE "user" (
    "id" UUID PRIMARY KEY DEFAULT gen_random_uuid(),
    "username" VARCHAR UNIQUE NOT NULL,
    "password" VARCHAR NOT NULL
);
If your database was created on Leapcell,

you can easily execute SQL statements using the graphical interface. Just go to the Database management page on the website, paste the above statement into the SQL interface, and run it.
Implement User Registration
Modify src/users/users.service.ts to add the logic for creating and finding users.
Note: For security, user passwords need to be encrypted before being stored in the database. We will use the bcrypt library for password encryption.
Install the required dependencies:
npm install bcrypt
npm install -D @types/bcrypt
// src/users/users.service.ts
import { Injectable } from '@nestjs/common';
import { InjectRepository } from '@nestjs/typeorm';
import { Repository } from 'typeorm';
import { User } from './user.entity';
import * as bcrypt from 'bcrypt';

@Injectable()
export class UsersService {
  constructor(
    @InjectRepository(User)
    private usersRepository: Repository<User>
  ) {}

  async create(user: Partial<User>): Promise<User> {
    const saltRounds = 10;
    const hashedPassword = await bcrypt.hash(user.password || '', saltRounds);

    const newUser = this.usersRepository.create({
      username: user.username,
      password: hashedPassword,
    });

    return this.usersRepository.save(newUser);
  }

  async findOne(username: string): Promise<User | null> {
    return this.usersRepository.findOneBy({ username });
  }
}
Create Auth Module and Login Logic Validation
We will place all authentication-related logic in a separate auth module. First, we will only implement the core "validate user" logic.
Use the CLI to create the auth module and service:
nest generate module auth
nest generate service auth
Modify src/auth/auth.service.ts to add a validateUser method for verifying if the username and password are correct.
// src/auth/auth.service.ts
import { Injectable } from '@nestjs/common';
import { UsersService } from '../users/users.service';
import * as bcrypt from 'bcrypt';

@Injectable()
export class AuthService {
  constructor(private usersService: UsersService) {}

  async validateUser(username: string, pass: string): Promise<any> {
    const user = await this.usersService.findOne(username);
    if (user && (await bcrypt.compare(pass, user.password))) {
      const { password, ...result } = user;
      return result; // Validation successful, return user info without password
    }
    return null; // Validation failed
  }
}
Now, import UsersModule into AuthModule so that AuthService can use UsersService.
// src/auth/auth.module.ts
import { Module } from '@nestjs/common';
import { AuthService } from './auth.service';
import { UsersModule } from '../users/users.module';

@Module({
  imports: [UsersModule],
  providers: [AuthService],
})
export class AuthModule {}
Create Login and Registration Pages
We need to provide an interface for user interaction. In the views folder, create login.ejs and register.ejs.
register.ejs
<%- include('_header', { title: 'Register' }) %>

<form action="/users/register" method="POST" class="post-form">
  <h2>Register</h2>
  <div class="form-group">
    <label for="username">Username</label>
    <input type="text" id="username" name="username" required />
  </div>
  <div class="form-group">
    <label for="password">Password</label>
    <input type="password" id="password" name="password" required />
  </div>
  <button type="submit">Register</button>
</form>

<%- include('_footer') %>
login.ejs
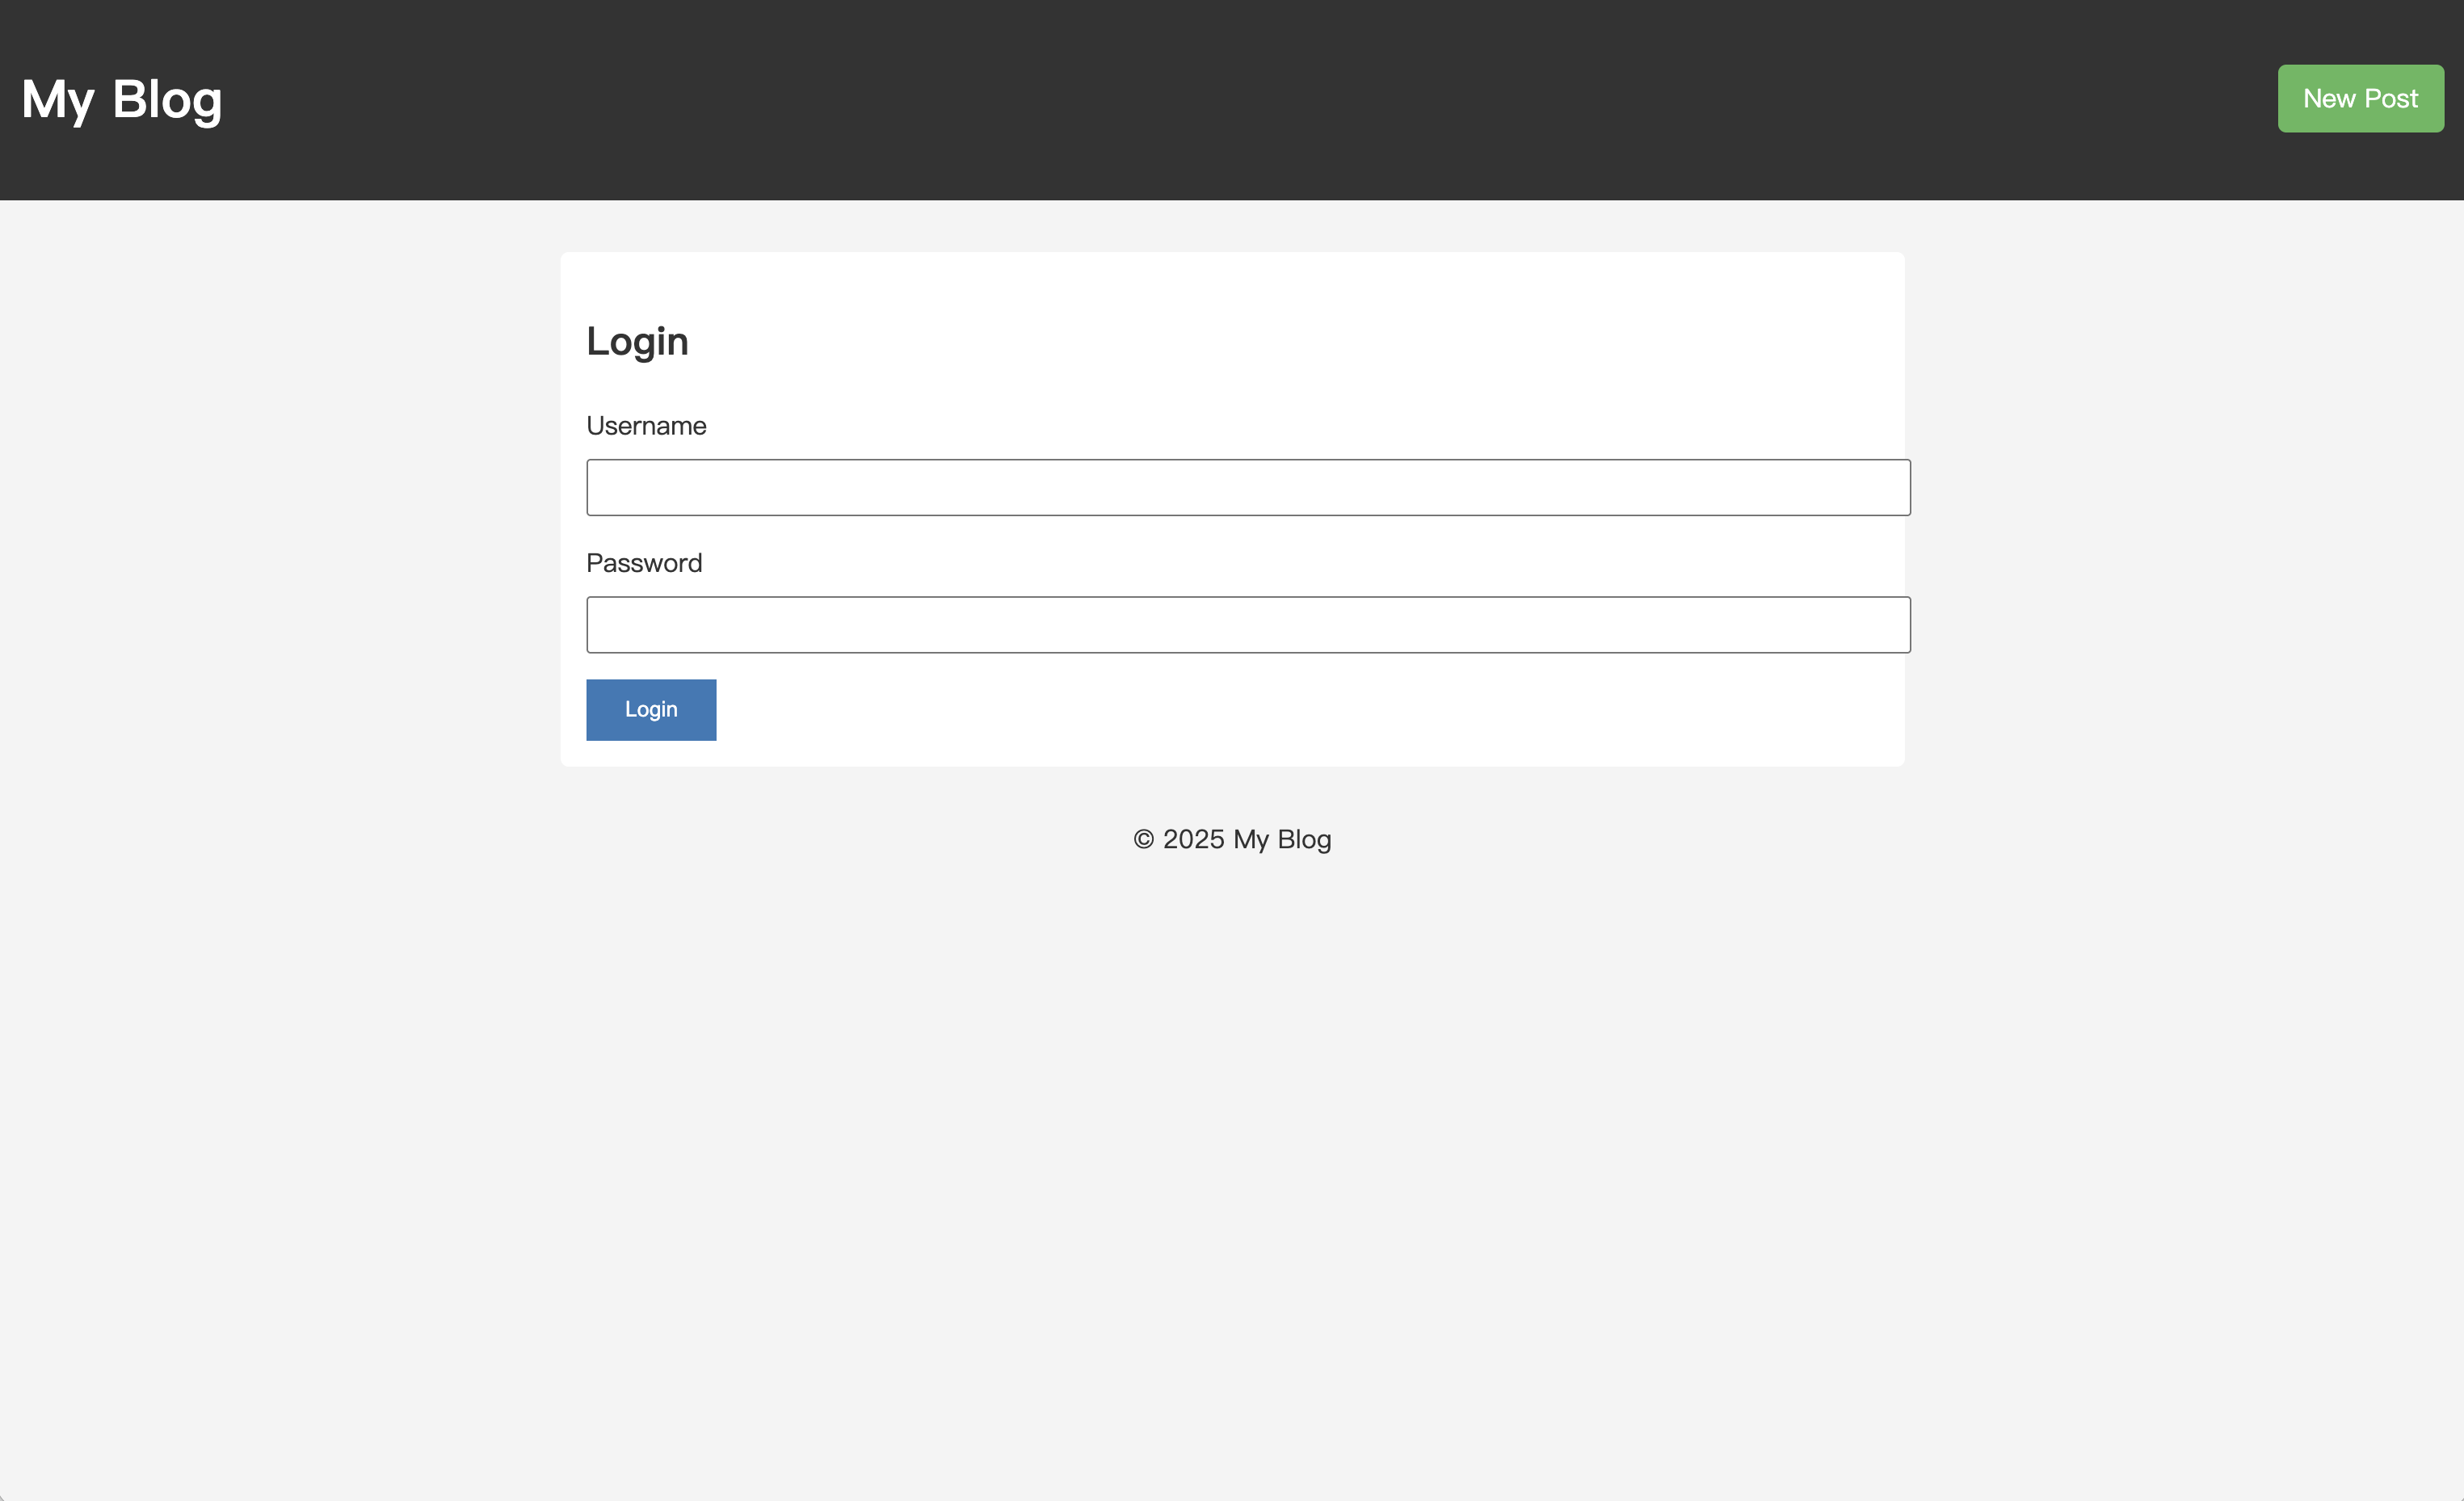
<%- include('_header', { title: 'Login' }) %>

<form action="/auth/login" method="POST" class="post-form">
  <h2>Login</h2>
  <div class="form-group">
    <label for="username">Username</label>
    <input type="text" id="username" name="username" required />
  </div>
  <div class="form-group">
    <label for="password">Password</label>
    <input type="password" id="password" name="password" required />
  </div>
  <button type="submit">Login</button>
</form>

<%- include('_footer') %>
Implement Routing and Controller Logic
Now, we will create the routes to handle registration and login requests.
Registration Route
Update src/users/users.controller.ts to handle displaying the registration page and form submission:
// src/users/users.controller.ts
import { Controller, Get, Post, Render, Body, Res } from '@nestjs/common';
import { UsersService } from './users.service';
import { Response } from 'express';

@Controller('users')
export class UsersController {
  constructor(private readonly usersService: UsersService) {}

  @Get('register')
  @Render('register')
  showRegisterForm() {
    return;
  }

  @Post('register')
  async register(@Body() body: any, @Res() res: Response) {
    // For simplicity, no complex validation here
    await this.usersService.create(body);
    res.redirect('/auth/login'); // Redirect to login page after successful registration
  }
}
Login Validation Route
Create a new auth.controller.ts to handle login requests.
nest generate controller auth
Edit src/auth/auth.controller.ts. Here, we will call the validateUser method. If validation is successful, we'll redirect to the blog's homepage.
If it fails, for simplicity's sake, we won't handle it specially for now. In a real application, you would typically return an error message.
// src/auth/auth.controller.ts
import { Controller, Get, Post, Render, Body, Res, UnauthorizedException } from '@nestjs/common';
import { AuthService } from './auth.service';
import { Response } from 'express';

@Controller('auth')
export class AuthController {
  constructor(private authService: AuthService) {}

  @Get('login')
  @Render('login')
  showLoginForm() {
    return;
  }

  @Post('login')
  async login(@Body() body: any, @Res() res: Response) {
    const user = await this.authService.validateUser(body.username, body.password);
    if (!user) {
      throw new UnauthorizedException();
    }
    // Validation successful
    res.redirect('/posts');
  }
}
Finally, import UsersModule and AuthModule into app.module.ts.
// src/app.module.ts
// ... imports
import { UsersModule } from './users/users.module';
import { AuthModule } from './auth/auth.module';

@Module({
  imports: [
    // ... TypeOrmModule.forRoot(...)
    PostsModule,
    UsersModule,
    AuthModule,
  ],
  // ...
})
export class AppModule {}
At this point, we have completed a basic user registration system and login validation logic. Users can create accounts, and the application can verify their identity.
Let's test it out. Start your project:
npm run start:dev
Visit http://localhost:3000/users/register to register.

After successful registration, you will be automatically redirected to http://localhost:3000/auth/login to log in.
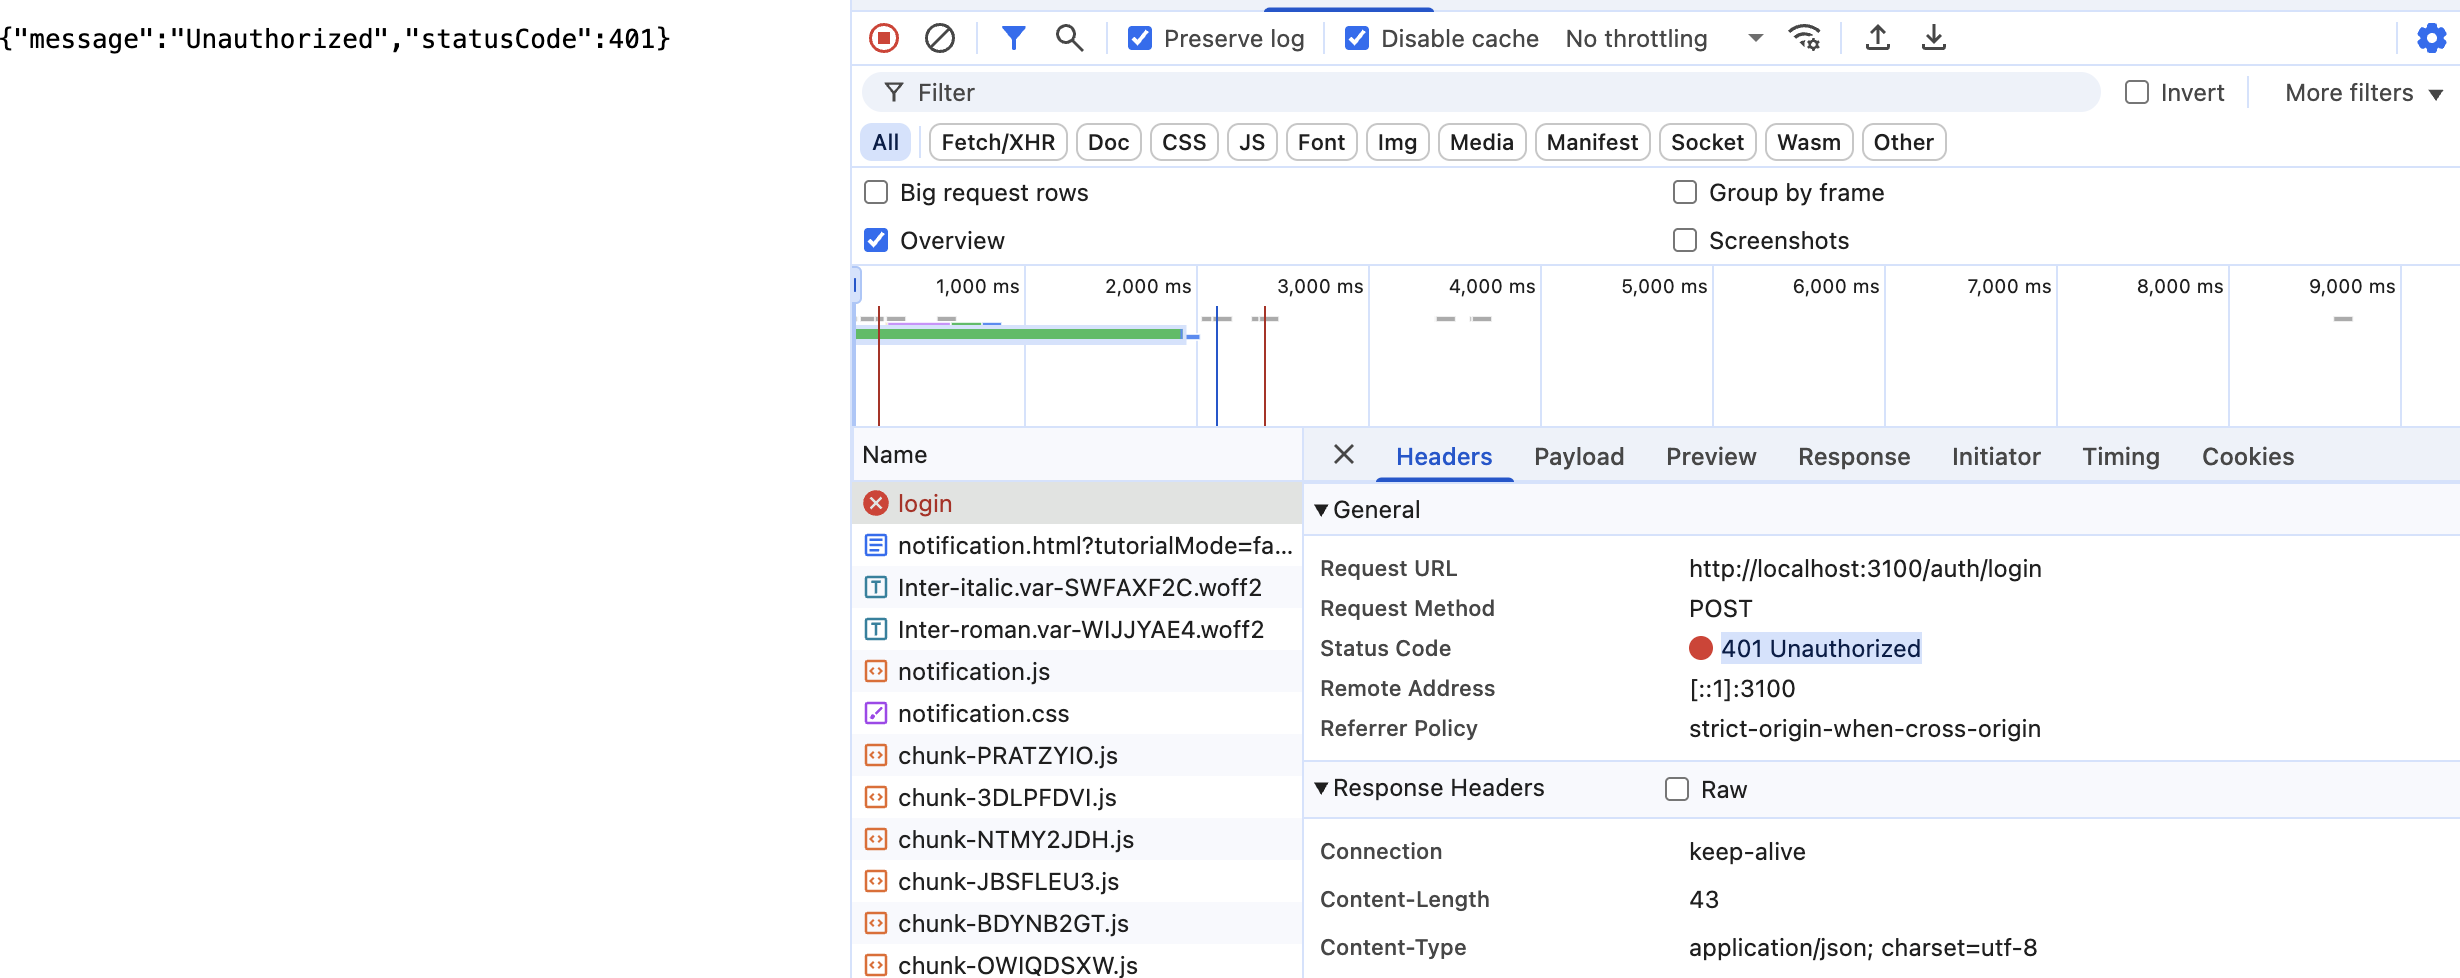
You can test the results of entering correct and incorrect account credentials. For example, if you enter the wrong information, the page will show a 401 Unauthorized error.
However, the current login is just a one-time process, purely for experiencing the login authentication flow; the server does not remember the user's login state.
In the next article, we will complete the login authentication logic to achieve true user session persistence and restrict access to pages and features based on user permissions.